使用SmartFTP上传内容/文件
1、打开SmartFTP,在文件菜单下,单击新建远程浏览器。

2、输入您的域名作为主机。同时输入FTP 用户名和密码。确保端口设置为21。单击“ 确定”以连接到服务器。

只能通过端口21上的FTPS上传内容。因此,您需要从协议下拉菜单中选择FTP over SSL(显式)选项。
3、连接后,您将看到一个窗格,其中列出了您网站下的所有文件和文件夹。

双击Web文件夹以将其打开。

注意:
根据Web Hosting包的目录/文件夹1结构,您需要将文件上载到相关文件夹。
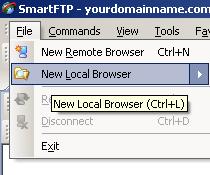
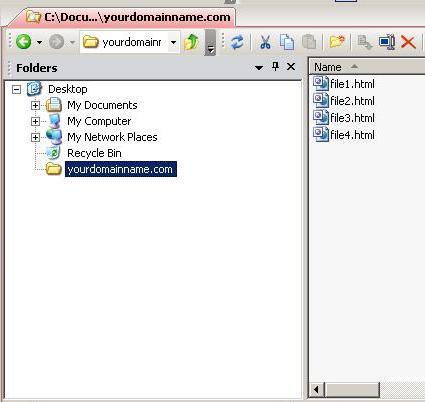
4、在文件菜单下,单击新建本地浏览器。这将打开另一个列出本地文件和文件夹的窗格。

5、打开包含您网站文件的目录。

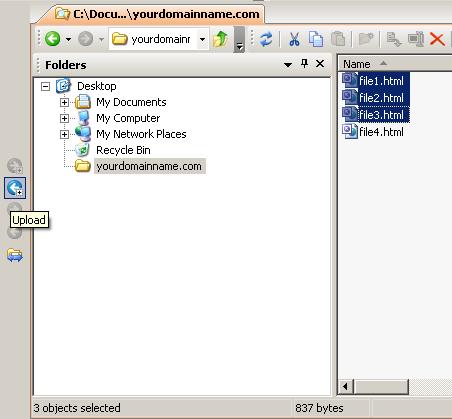
6、选择要上载的文件,然后单击“上传”按钮将文件上传到Web服务器。

SmartFTP全局设置
1、在工具菜单下,单击设置。

2、在“ 连接”对话框下,将“ 数据连接”部分中的“ 模式”从“ 被动模式”(PASV)更改为“ 活动模式”(PORT),反之亦然。单击“ 确定”以保存更改。

此更改将影响默认情况下为其设置数据连接模式的所有站点。
收藏夹项目设置
1、在收藏夹菜单下,单击编辑收藏夹。

2、在“ 快速连接”文件夹下选择该站点,右键单击,然后单击“ 属性”。

3、转至连接对话框并更改模式在数据连接的部分被动模式(PASV) ,以主动模式(PORT),反之亦然。然后,单击“ 确定”。

保存更改以用于此站点的未来FTP会话。
相关内容推荐:>>>使用Core FTP上传内容/文件的方法